•In the various sample installation procedures described above, we followed a certain sequence of steps to prepare your EventPro database: create a new placeholder database, and then restore the existing EventPro database over the placeholder.
•We also noted that there is an alternate sequence of steps that you could follow after installing the Data Updater. These instructions will briefly describe this alternate process.
1.After installing the Data Updater, you can restore the backup of the existing, prepared EventPro database. (In this sequence of steps, you are not restoring it over another database, as described in the other method of preparing the database.)
a.Run SQL Server Management Studio. (Remember that the version of SQL Server Management Studio you are running may be different, but you should be able to find the same or similar functions.)
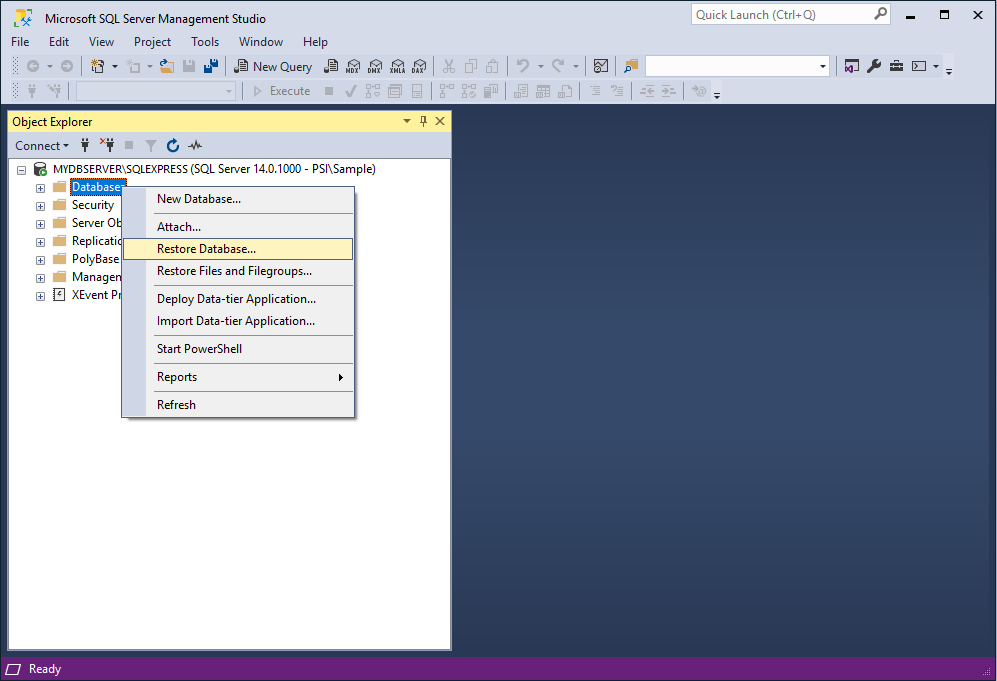
b.In SQL Server Management Studio, right-click the Databases folder and select Restore Database.
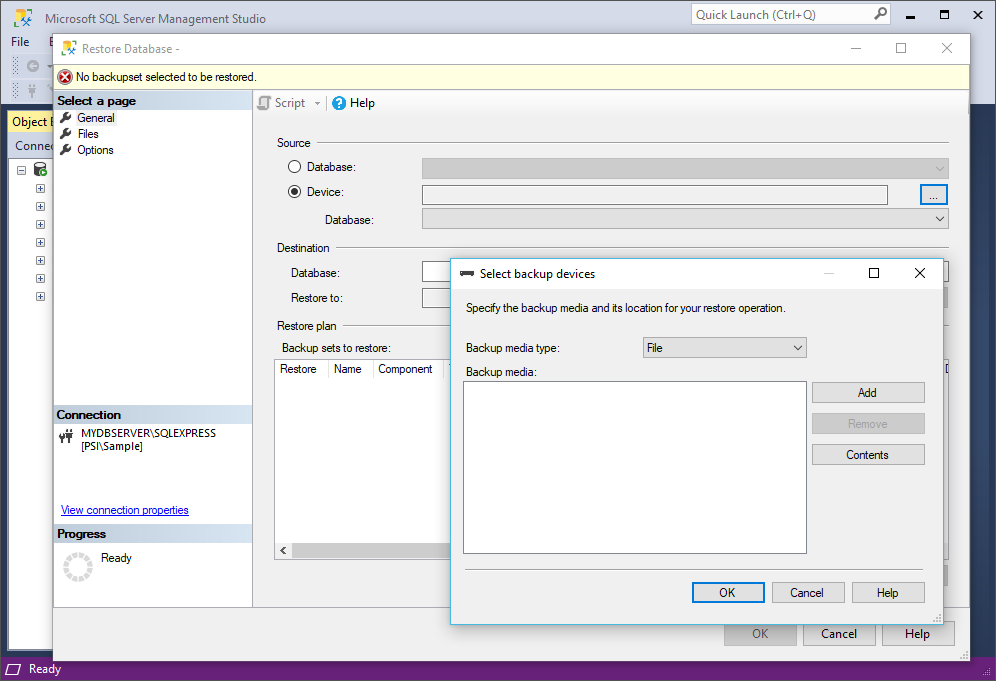
c.In the Restore Database window, under Source, select the radio button next to Device, and click the ellipsis.
The Select Backup Device window appears.
d.In the Select Backup Device window, click Add.
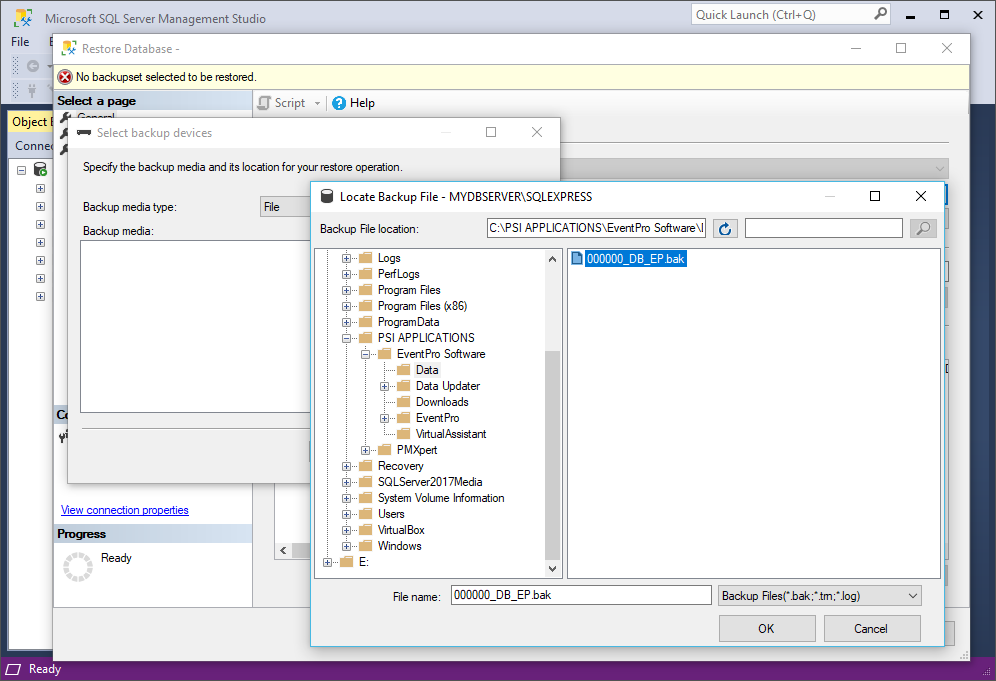
e.The Locate Backup File dialog appears. Find and select the backup file of the EventPro database that your Training or Support Specialist sent you, and click OK. Click OK in the Select Backup Devices window to return to the Restore Database window.
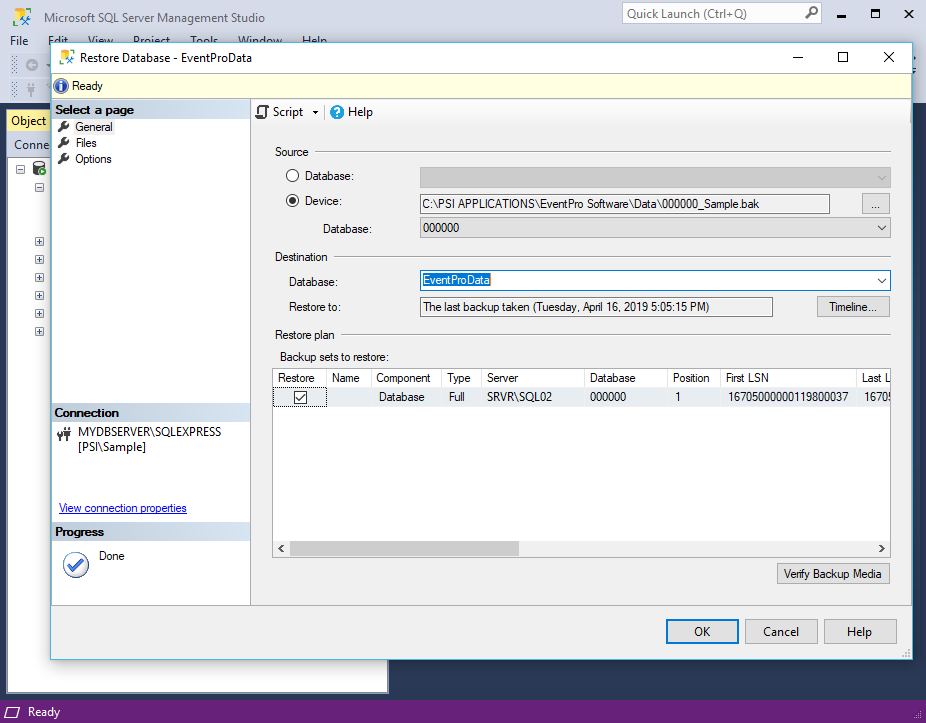
f.Back in the Restore Database window, check that the Destination Database is correct. If you prefer, you can change the name of the database to the commonly used EventProData.
g.Click OK. The database restore will begin.
h.When the database restoration is complete, you will see that your EventPro database has been added under Databases in the Object Explorer panel of SQL Server Management Studio.
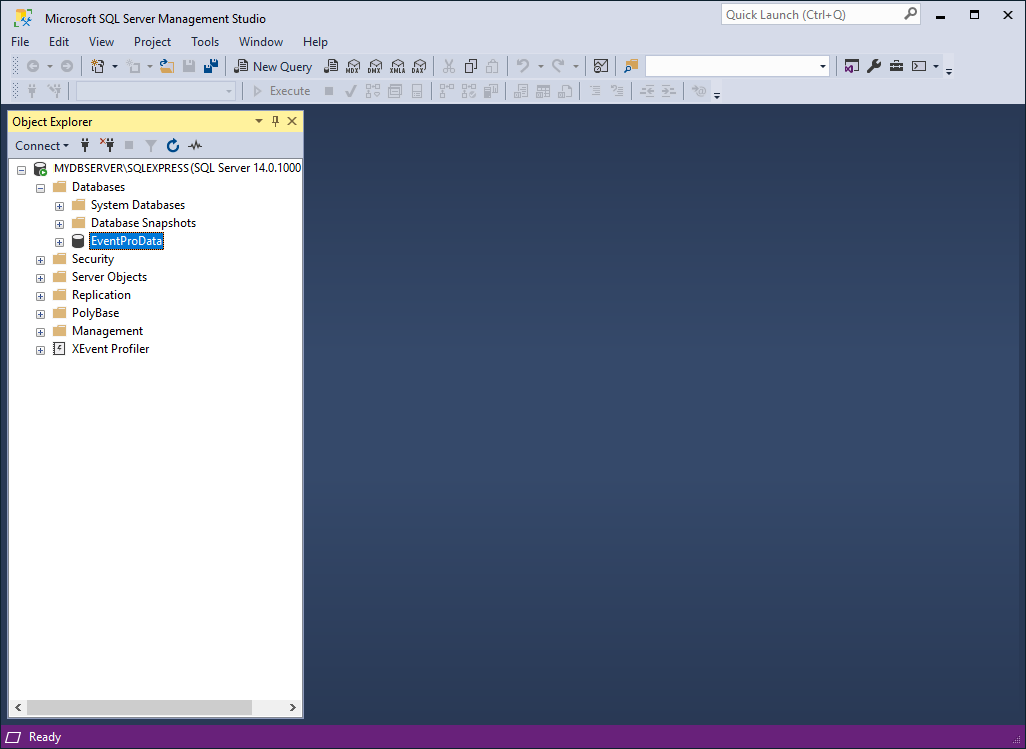
2.The next step is to install EventPro Software. Follow the process as described for the particular installation type, but do not run the EventPro program yet. This step will add the EventProMaster database.
3.Next, you will link the client database to the EventProMaster database.
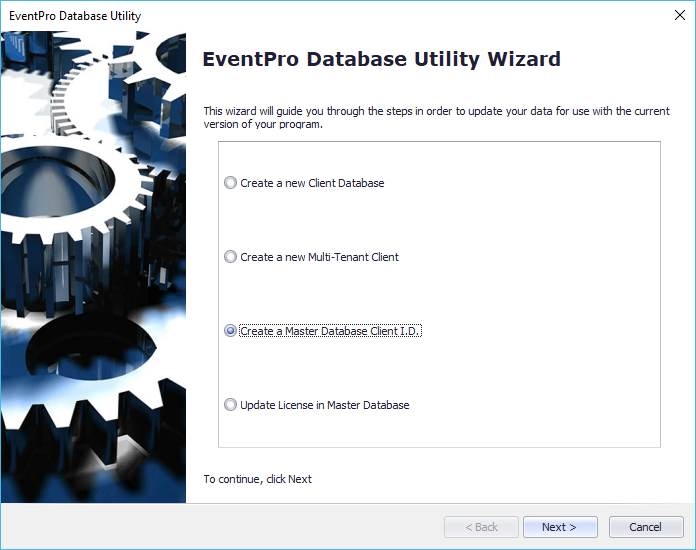
a.Run the Database Utility Wizard and select "Create a Master Database Client ID".
b.In the Target Database page of the wizard, enter the required information. Most of these fields are described in the installation instructions above, except for Tenant I.D., which is a field required specifically for linking the client and Master databases.
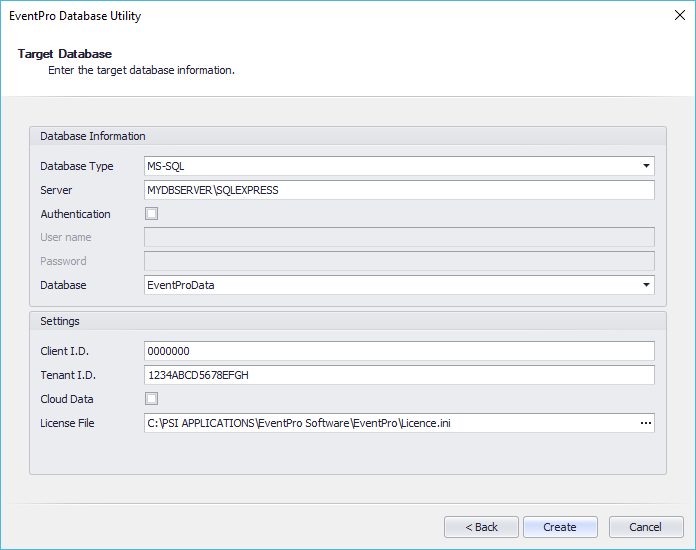
c.To find the Tenant I.D., return to SQL Server Management Studio. (Remember that your version of SQL Server Management Studio may be slightly different, but you should be able to find the same or similar functions.)
d.In the Object Explorer panel, expand Databases > EventProData (or whatever your client database is called) > Tables, and locate the SecurityUser database.
e.Right-click the SecurityUser database, and click Select Top 1000 Rows.
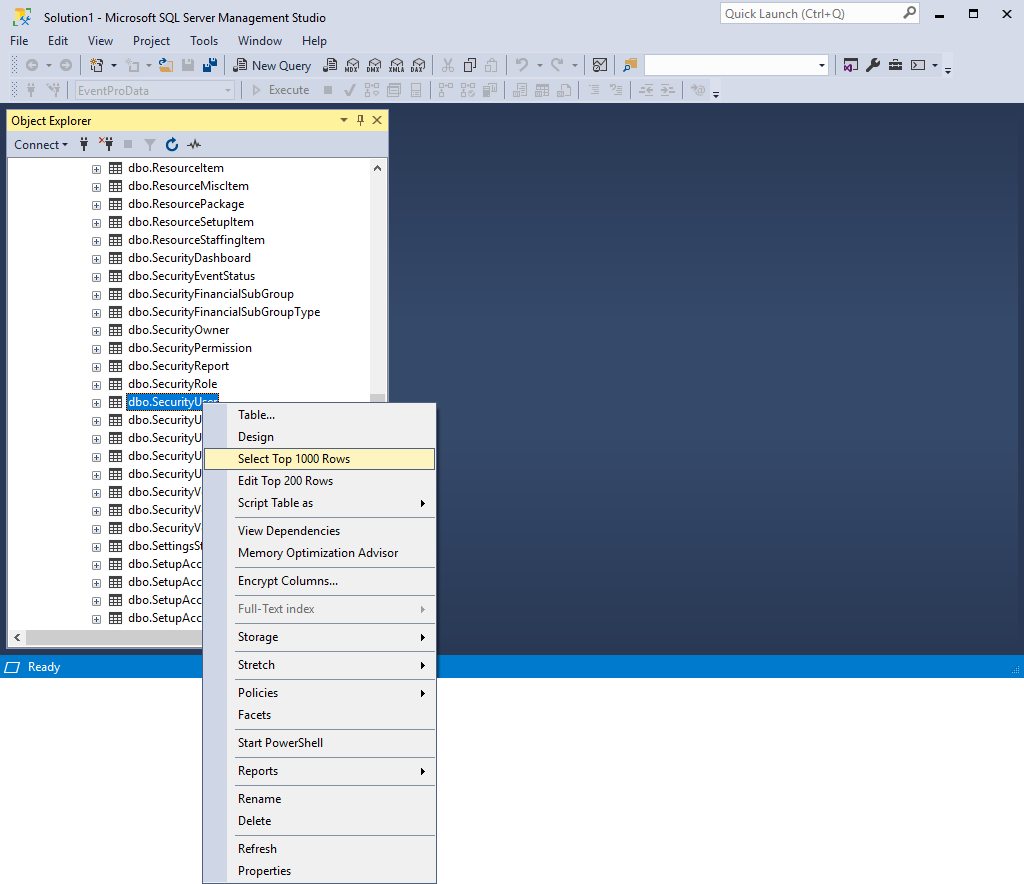
f.In the Results tab to the bottom right, locate the Tenant I.D. column, and copy any one of the values.
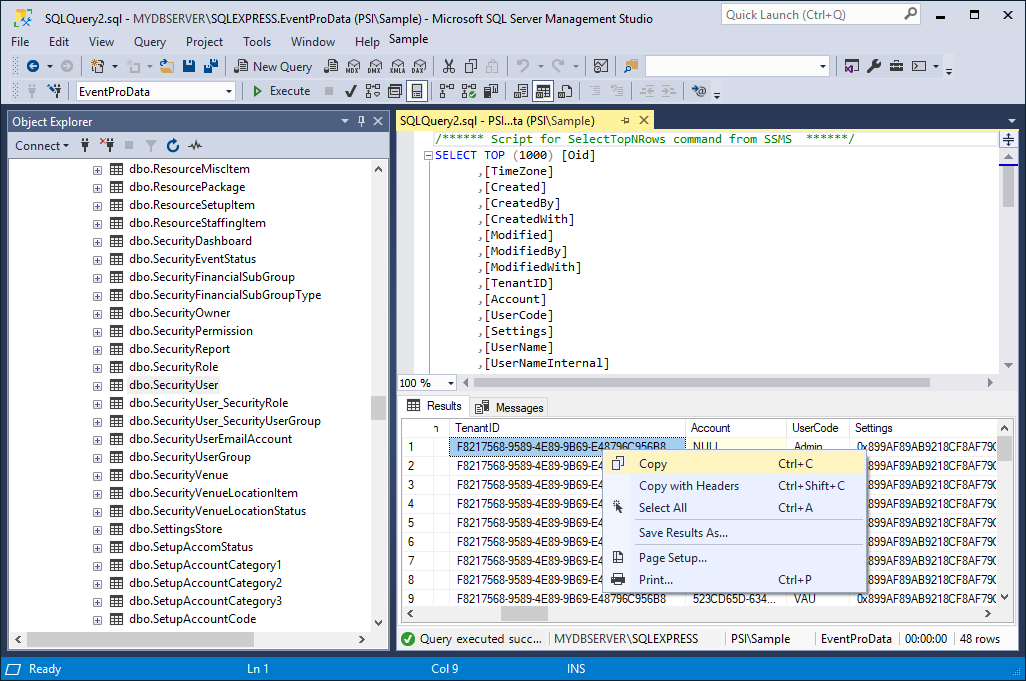
g.Return to the EventPro Database Utility wizard, and paste that Tenant I.D. value into the Tenant I.D. field of the Target Database page.
h.Finish working through the EventPro Database Utility wizard.
4.You can now continue with the installation process as described for the particular installation type you are completing. This may mean you now have to give database rights to users, change the SQL user's rights, or login to EventPro for the first time.