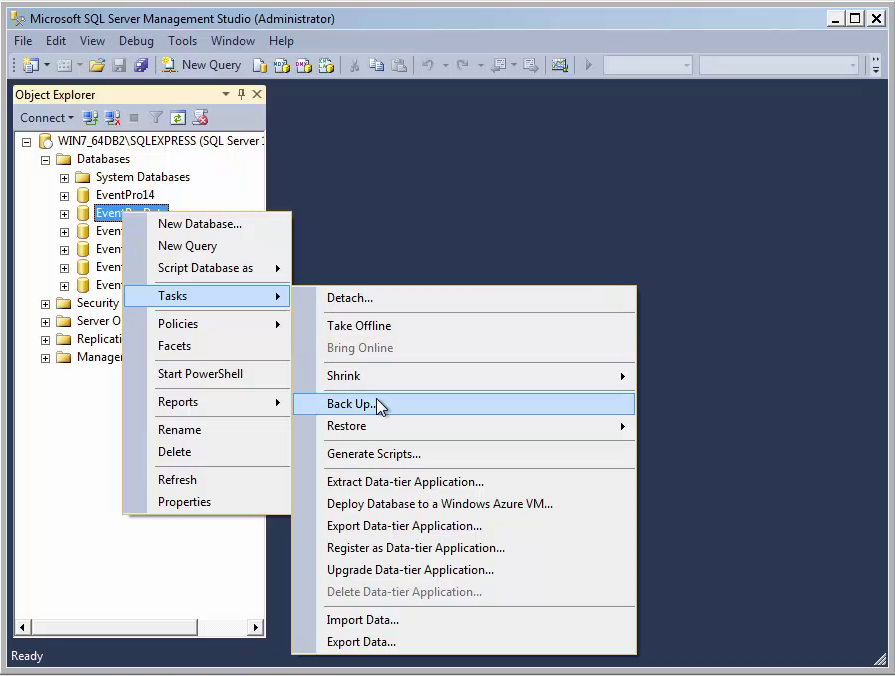
1.Go to your Microsoft SQL Server Management Studio. 2.Right-click on the database you want to backup. The database is likely called EVENTPRODATA, unless otherwise renamed by you. 3.From the right-click speed menu, select Tasks > Backup.
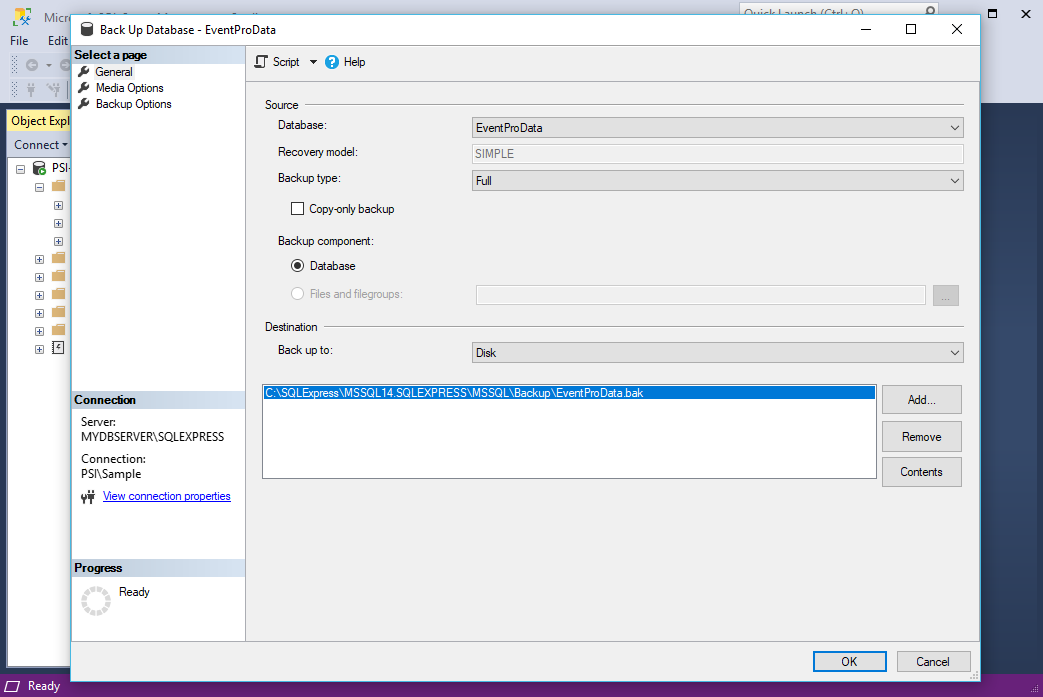
4.In the Back Up Database window, ensure that these settings have been selected: a.Under the General page: i.Backup type: Full ii.Back up to: Disk
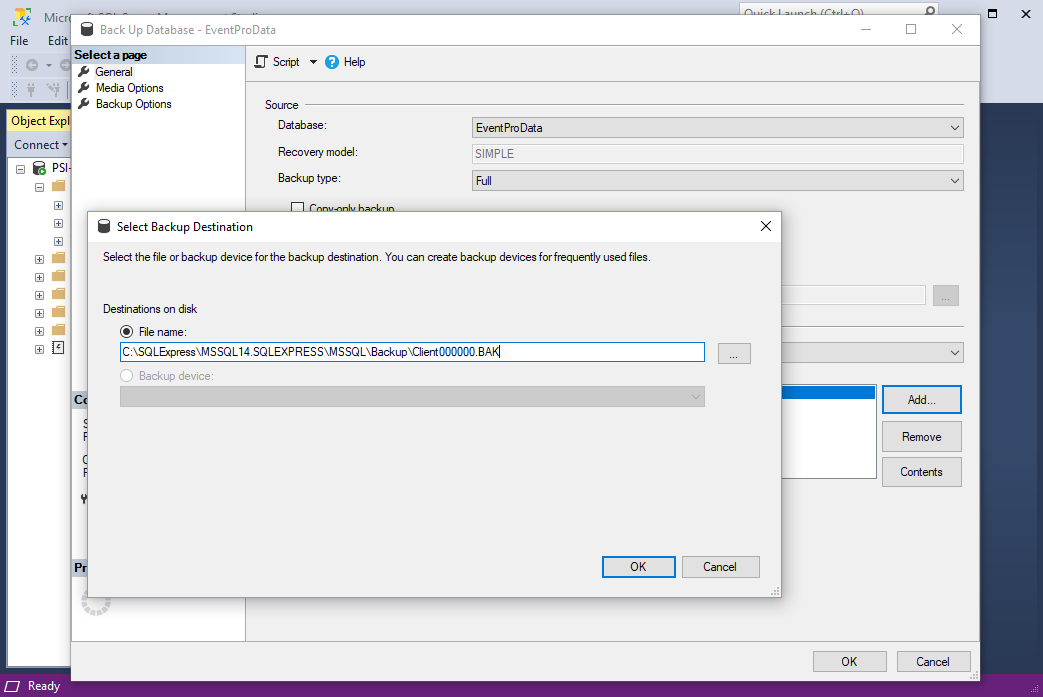
iii.Since EventProData is the default name for all databases, you should ideally rename your backup database so that it is more easily identifiable for EventPro Support. At the bottom of the window, click Add.
In the Select Backup Destination dialog, name the Destination with your 6-digit User ID, or the name that your Support/Training Specialist has recommended.
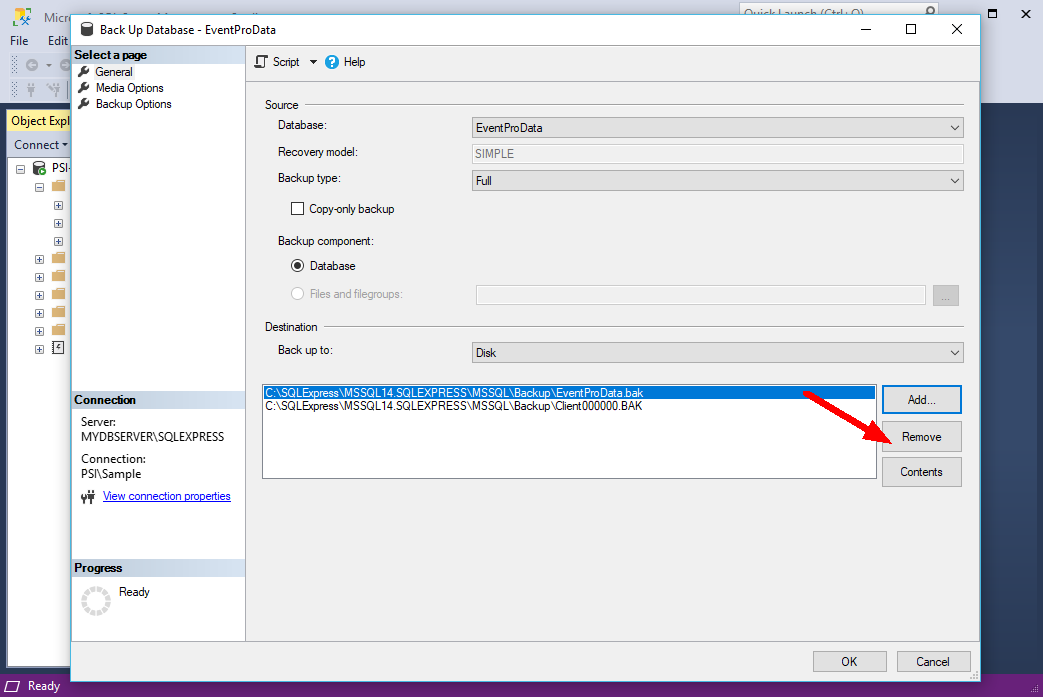
iv.You can then Remove the original name.
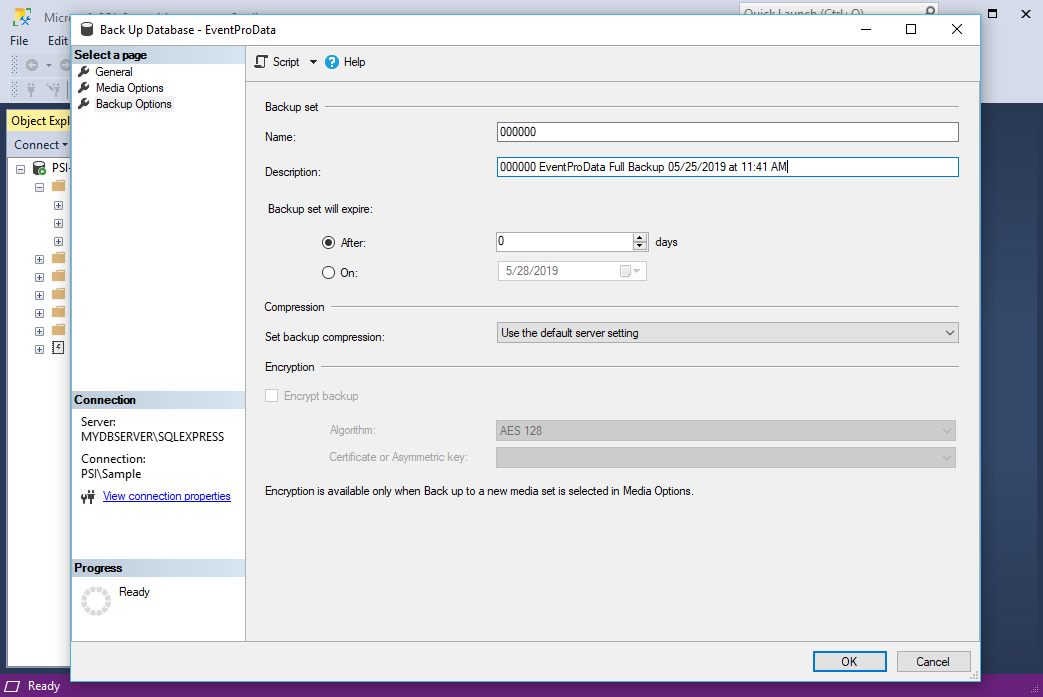
b.Under the Backup Options page: i.Name: Also change this name to include your 6-digit User ID. ii.Description: Enter a description, such as Backed up on DATE at TIME.
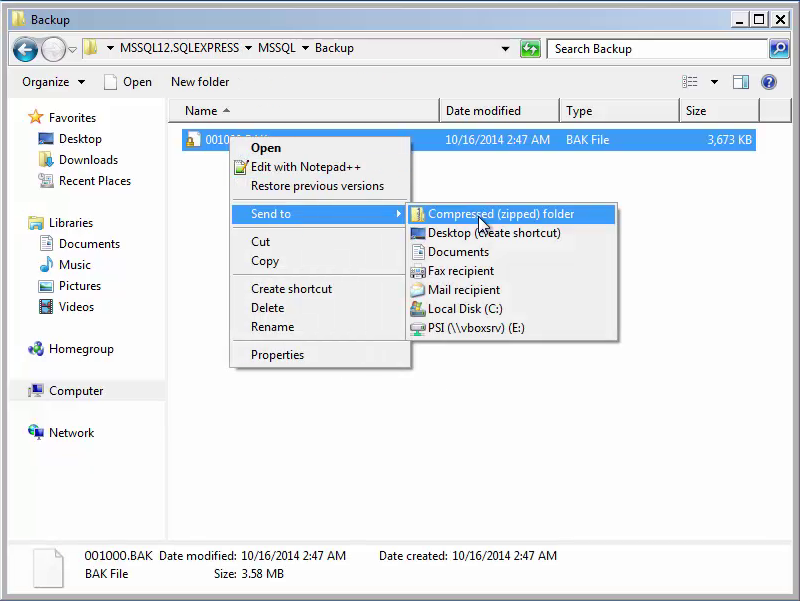
c.Click OK. It may take a few minutes to backup, depending on the size of your database. 5.Click OK again when the backup is complete. 6.Now, on your Database Server, you should have access to the Backup folder, which contains the backup file you just created. On the backup file you created, right-click and select Send To > Compressed (zipped) Folder to create a zipped folder.
If not already done, remember to name that zipped folder as your 6-digit User ID number, or the name that your Support/Training Specialist has recommended.
|

