Create New Client Database for EventPro On-Prem Software Standalone Installation |
Scroll Prev Top Next More |
In most cases, an existing database will be prepared for you, containing information that has been converted from a previous database or added under the guidance of your EventPro Training & Implementation Specialist. That database will be sent to you so that you can restore it.
Before restoring the database, however, this process requires that you first create a new database with the EventPro Database Utility. The new database you are creating here is essentially a placeholder. Later, you will restore your existing database over this new "placeholder" database.
1.Run the EventPro Database Utility Wizard by selecting EventPro Data Updater from your Start Menu, or double-clicking the EventPro Data Updater application file in the folder to which you installed it.
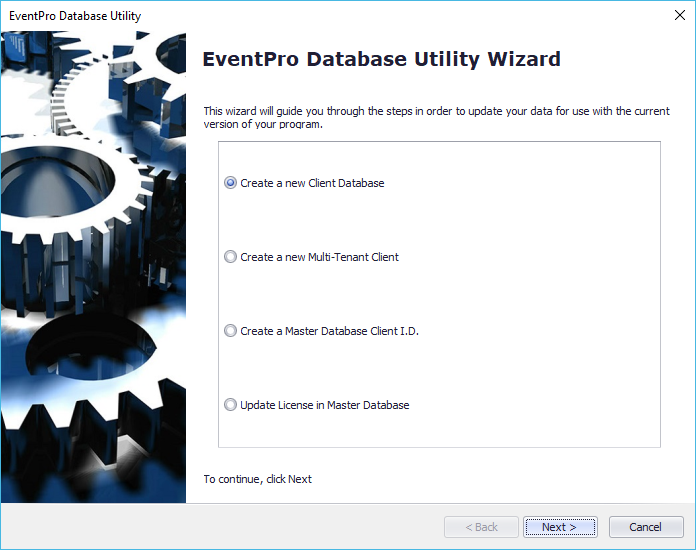
2.On the first page of the wizard, select Create a New Client Database, and click Next.

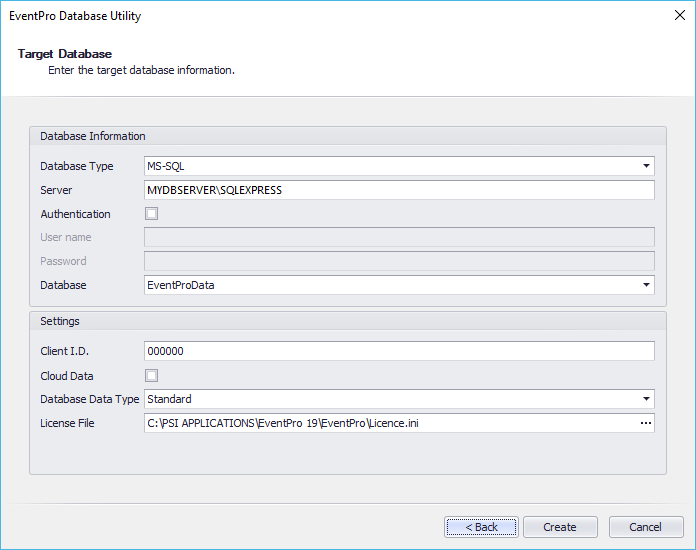
3.Target Database:
Enter the target database information.

a.Database Type: Choose MS-SQL.
b.Server: Enter the SQL Server Named Instance, identifying the network name of the computer plus the instance name you specified earlier when installing SQL Server (i.e. "SQLEXPRESS").
It will look something like this: MYDBSERVER\SQLEXPRESS
c.Authentication: Leave the Authentication checkbox unselected, indicating that the User will connect to the SQL Server instance using Windows Authentication.
d.Database: Type in (don't select from the drop-down) the name of the new database you are creating, e.g. EventProData.
The Data Updater will create 2 databases:
i.This named database (i.e. EventProData), over which you will later restore the existing, prepared database from your Training or Support Specialist.
ii.An EventProMaster database to control licensing.
e.Client I.D.: Typically, you would use your six-digit License ID for the Client I.D.
f.Cloud Data: Leave this unselected, as you are installing EventPro to your computer.
g.Database Data Type: From the drop-down list, choose Blank or Standard.
i.Standard means the database will be populated with some basic default data, namely Statuses, Titles, Communication References, Booth Types, Budget Types, Payment Types, Location Features, and Location Setup Types. Clients typically choose Standard, as they find it easier than starting from a completely blank database that has no frame of reference. The pre-entered status, titles, etc. can easily be edited to suit your organization's terminology.
ii.Blank means a completely blank database, with no pre-entered data.
Since you will be restoring an existing database over this new database, it doesn't really matter which data type you select.
h.License File: Click the ellipsis (...) and browse to your license file (Licence.ini). This is the license file you downloaded earlier.
i.When you have entered all of the target database information, click Next.
4.The last page of the wizard will inform you that the process is complete. Click Finish.
5.You can now proceed to Restore Existing Database over New.